Physical Components
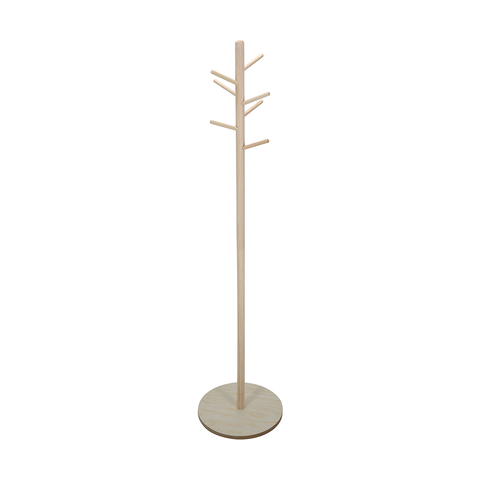
A tree-shaped coat stand
The main part of the whole ‘breathing tree’ is a tree-shaped coat stand with seven different ‘branches’ that are used to fix the LED lights.

Table tennis balls & LEDs
The lights part consists of some diffused LED lights, table tennis balls and resistors. By putting LEDs inside these balls, it can offer users the brighter visual feedback.

Decorations for the 'tree'
To make the ‘tree’ less bald and give it a more polished appearance, some ‘plant strips’ are used to decorate each ‘branch’ of the ‘tree’.
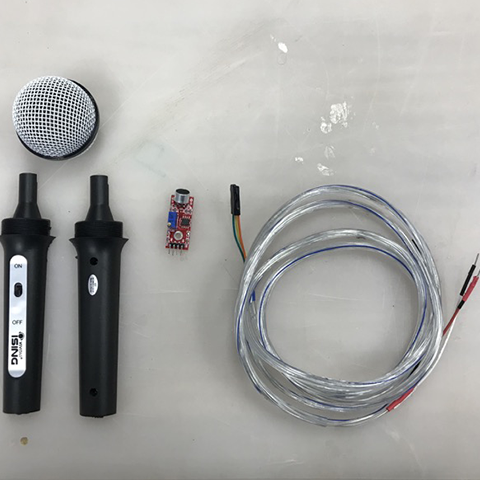
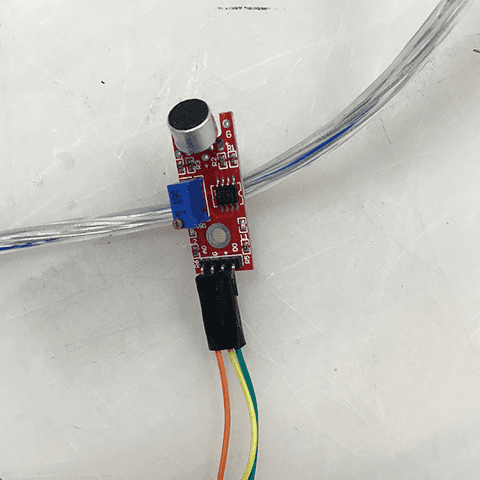
The microphone
The microphone of this concept is made from a disassembled real microphone, an Arduino microphone sensor module and a soldered long wire.
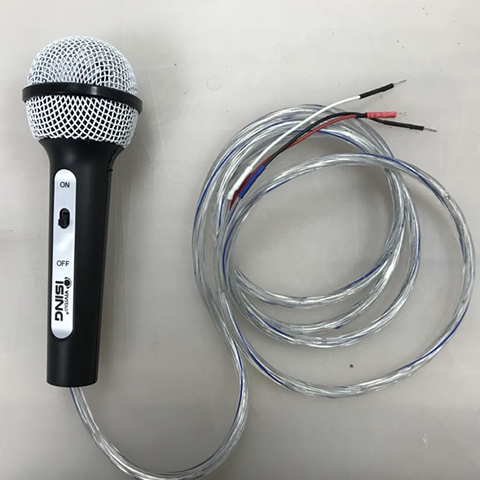
The completed microphone
The assembled final microphone of this concept looks no difference from other real microphones in appearance, which can give users a more authentic experience.
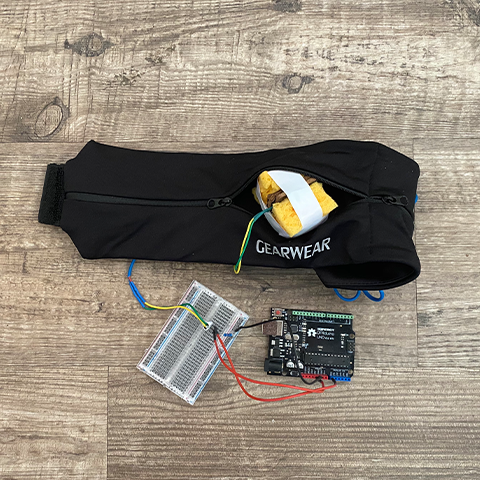
The belt part
A running belt, an Arduino UNO board and breadboard are used to build the ‘belt’ part of this project. And a soldered long wire is used to connect these parts.
Technical Components
Arduino

Microphone sensor: Receive data from users’ breath. By using this sensor, the microphone can detect how long users
have breathed and whether users’ breathing behaviour is stable or not. Therefore, it can pass the data to Arduino UNO board,
and further control the lighting effect of lights.
FSR: Detect users’ abdomen movement, and control the auditory feedback.
Python


PySerial library: It is used to support serial connections between Arduino and Python. By using that, the breath data read
from the ‘belt’ can be passed from the Arduino serial port to Python.
Pygame library: It is used to trigger the audio output of the project. According to the data got from Arduino, the codes in
ython can control whether to play music.
Wiring Diagram
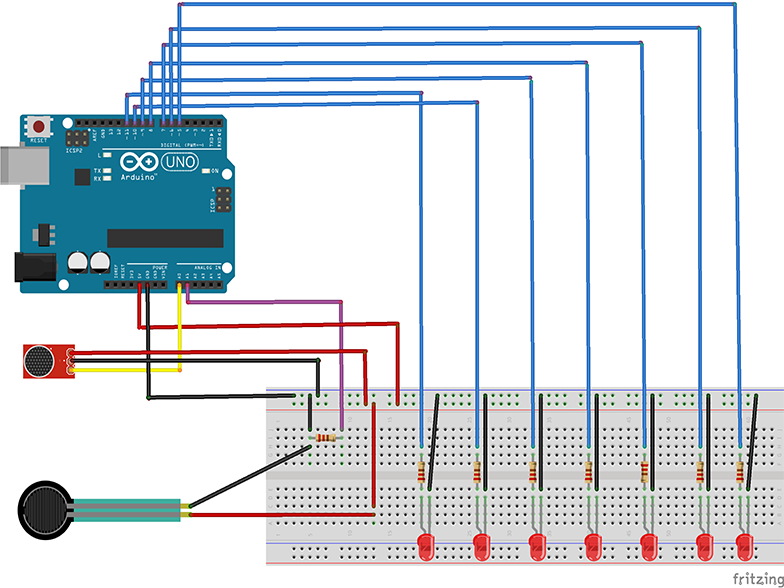
The digital components are mainly divided into two parts, the microphone and LED part and the force sensor part.
The microphone sensor is connected to 5 voltages, ground and analogy 0. The positive pole of each LED light is connected to a digital pin through a 220-ohm resistor, and the negative ones go to the ground. According to the microphone value read from analogy 0, 7 LEDs can be turned on or turned off.
For the force sensor, one pin of that is connected to ground and analogy 1 through the 10k-ohm resistor and another one goes to the 5 voltages. According to the pressure value read from analogy 1, the force sensor can pass data to Python through the serial port, so as to further provide users with the auditory feedback by playing music sound.